Our Resin Driveway Installation Process
How do you install a resin driveway?
Quote, preparation, installation, curing, etc.
Our process has naturally presented itself after almost 10 years of experience laying resin driveways for residential and commercial properties. We have tested different methods in the past, but this particular method is the best we have found. It consists of an initial visit, the prep work, installation, edging, mixing resin, spreading resin, and applying finishing touches. To see what our process looks like with images, please carry on reading!
Get Your Free Estimate
Contact Us
Stage 1: Preparation
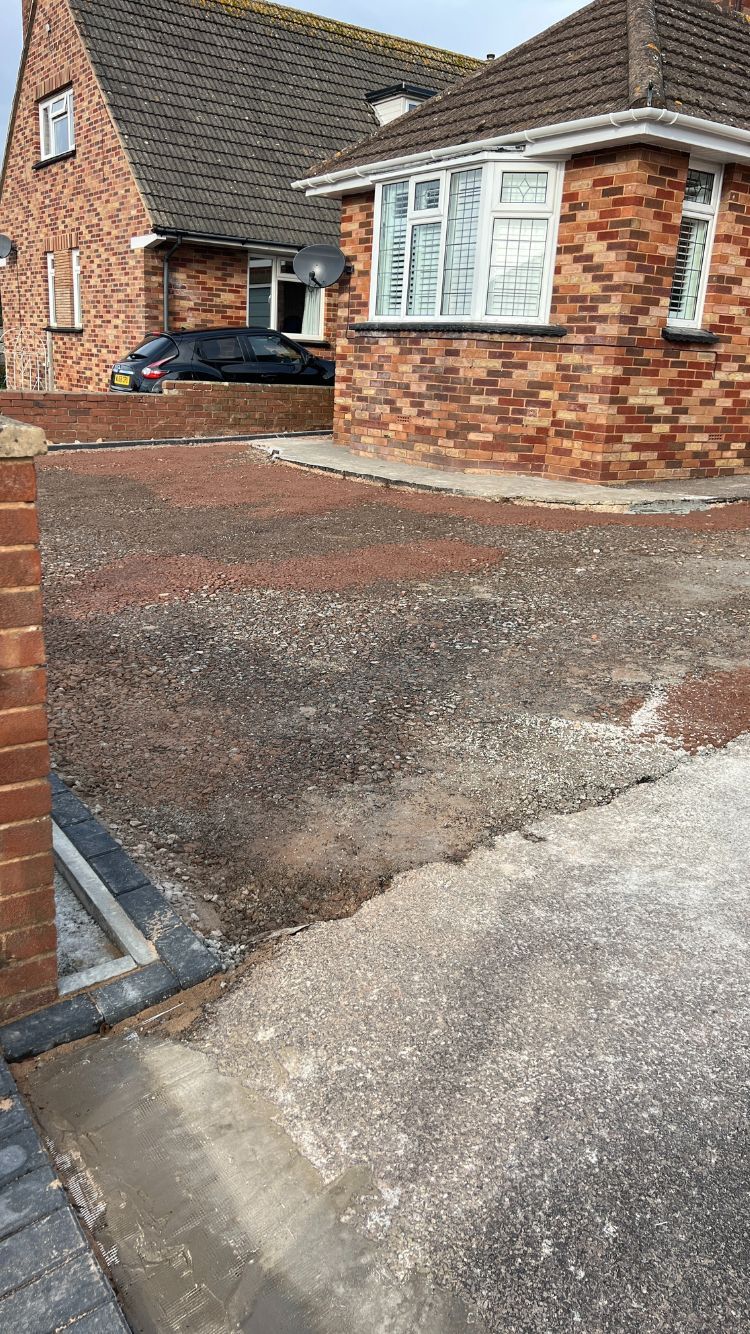
Depending on the current state of your driveway, the prep work can vary.
There are two possible situations: either we can use the existing surface as base, or we must create a new base.
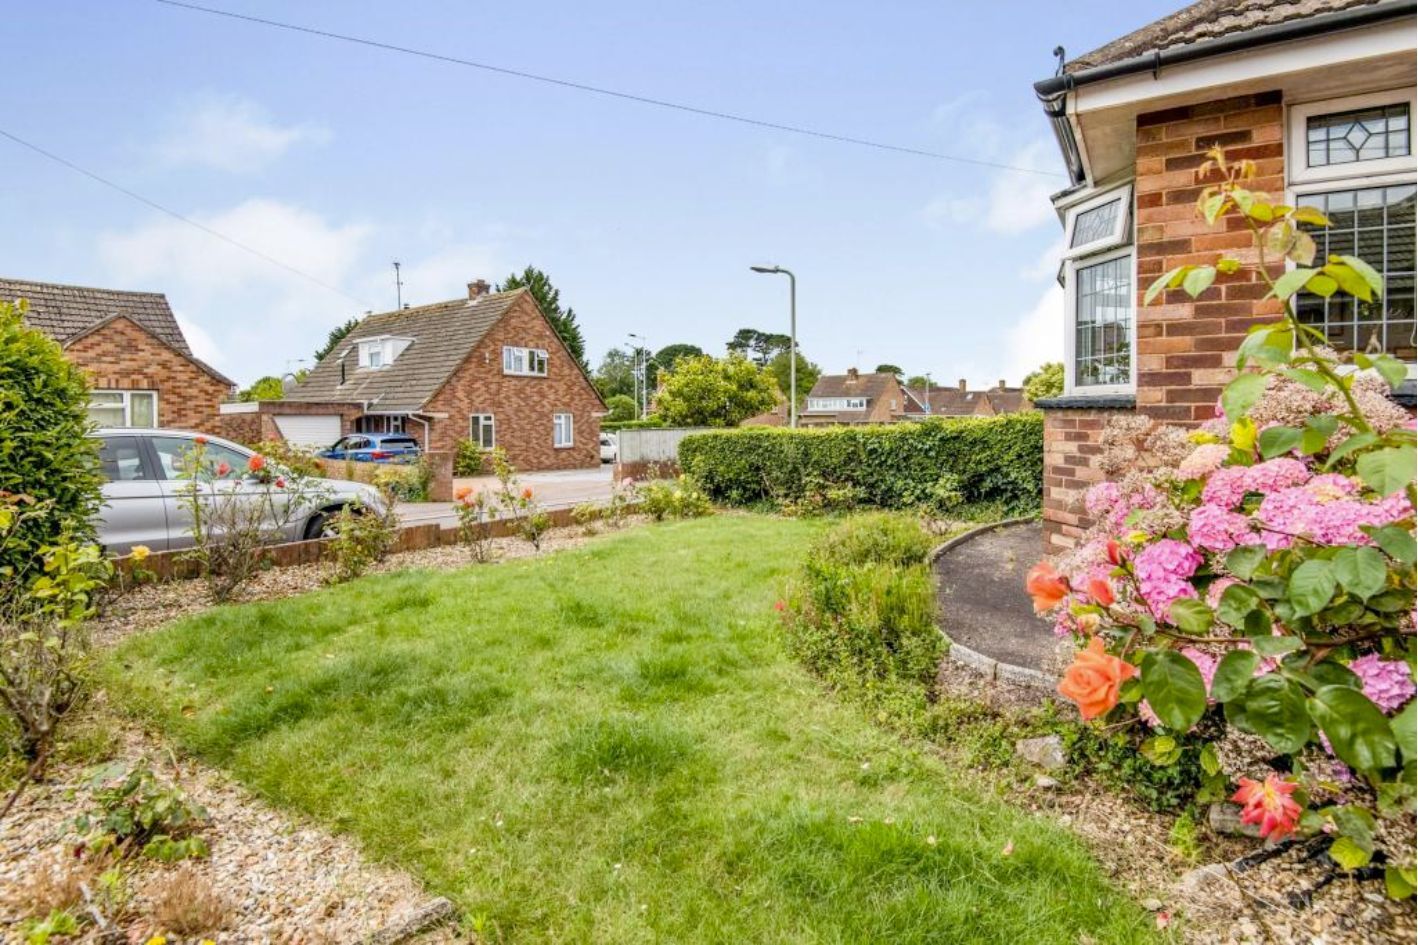
In the example showed below, we were able to use half of the existing driveway as the base, and the rest needed a new base.
Here are some images to illustrate the preparation of the part that can be reused as the base:
Before preparation

After preparation

For the other half of the driveway, we must install our own base, which is made with permeable tarmac, please view the example below:
Before permeable tarmac
Remove existing surface
After permeable tarmac
Qualified & Experienced
Call Us Today To Get A FREE, No-Obligation Estimate
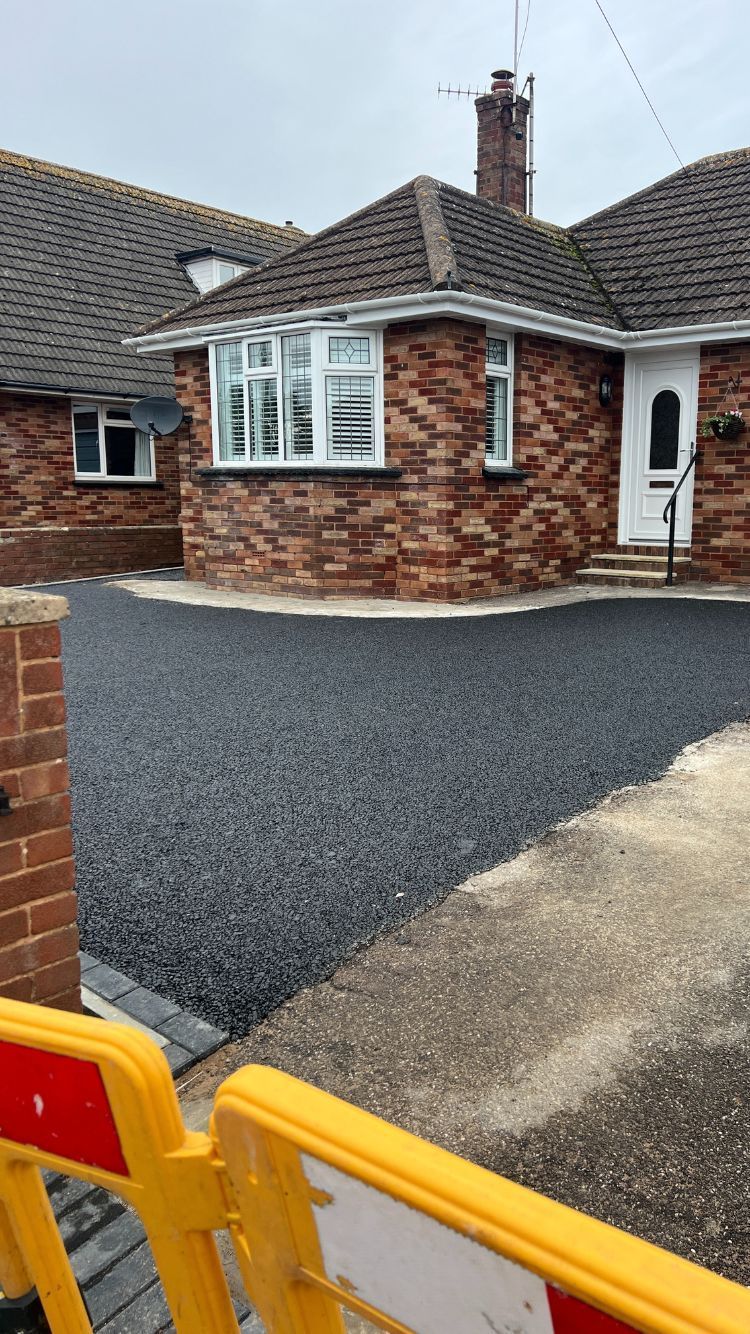
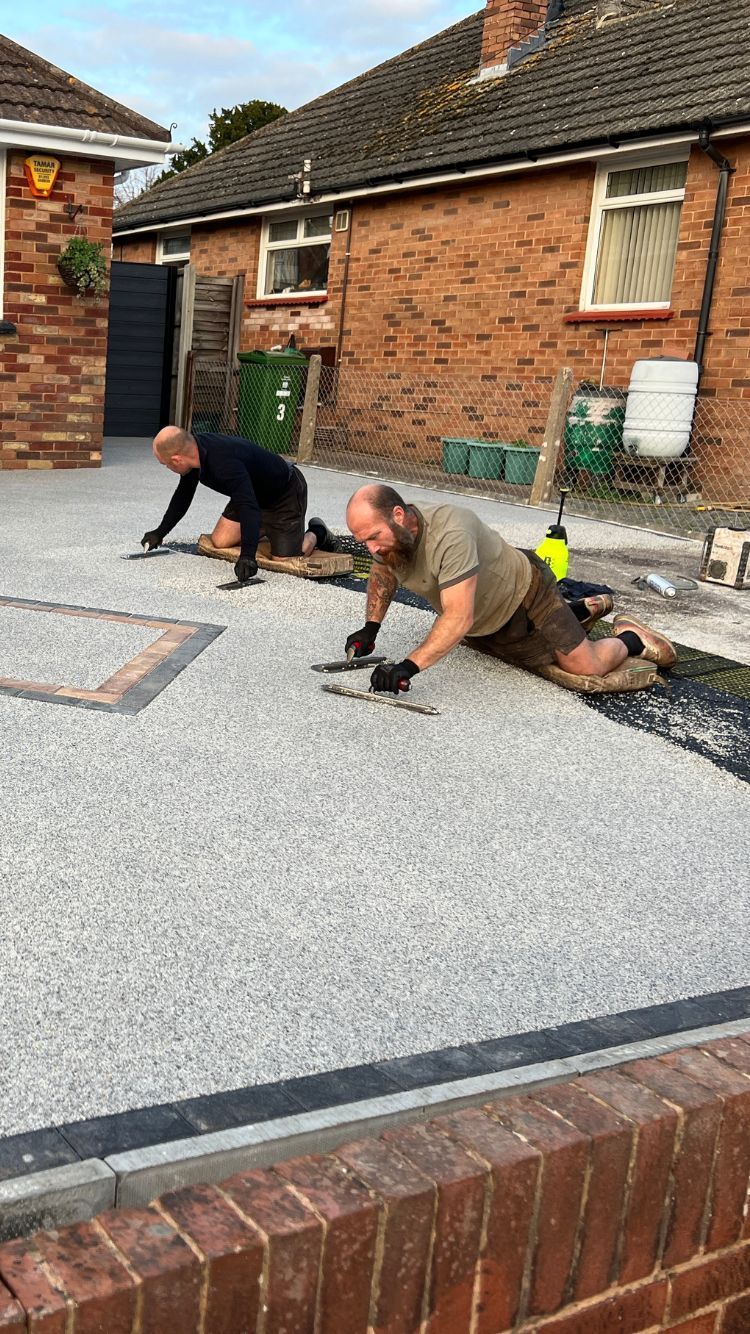
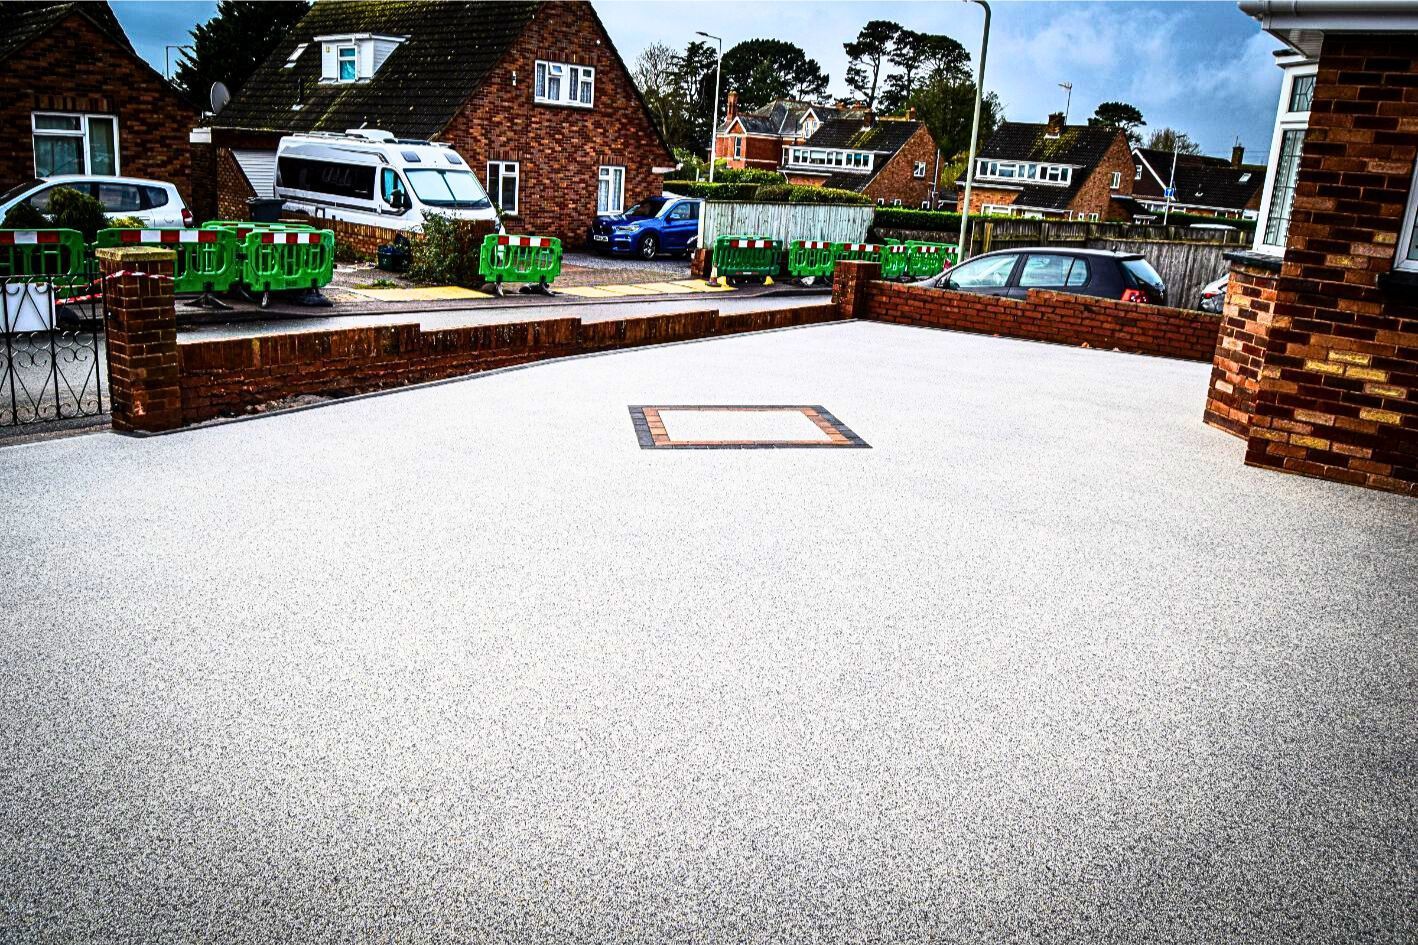
Stage 2: Spreading The Resin
After, we can finally spread the resin, which truly transforms the driveway, and revives it entirely.
Please view the images showed below:
Before resin
During resin installation
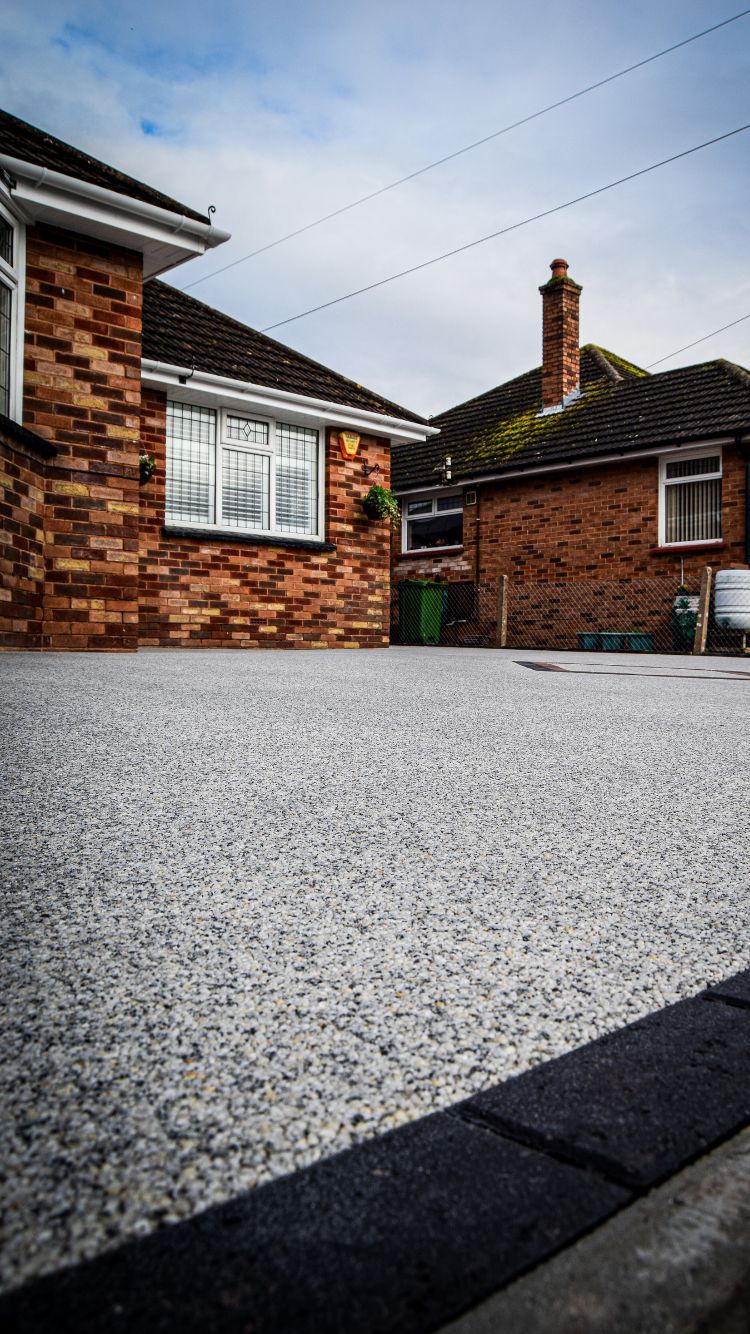
After resin installation
Stage 3: Let It Set
The driveway is now looking beautiful, and it is almost finished. The resin itself takes about 8 hours to set, but we recommend at least 24–48 hours before walking on it, and a minimum of 48 hours before driving on it.
To show you the surreal transformation, here are some photos from the very beginning and the very end of our process. Restoring a driveway is a work of art, and it's something we are very passionate about!
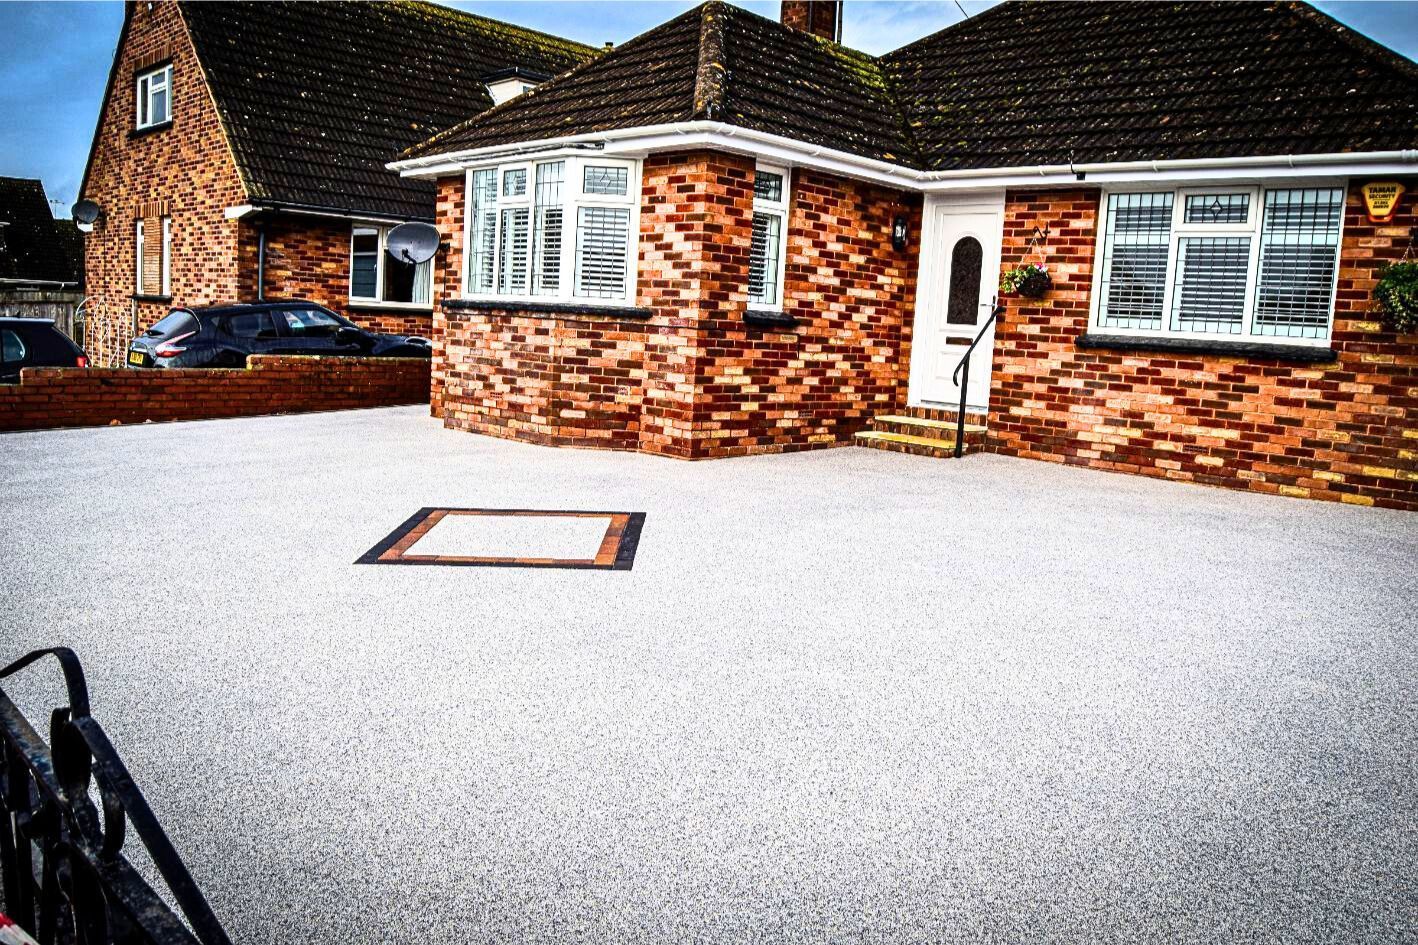

More photos of the finished work can be found below:


View our YouTube video here:
Qualified & Experienced
Call Us Today To Get A FREE, No-Obligation Estimate
Call

Working hours
- Mon - Sun
- -